
Easy DIY Metal-Look Ornaments Made From an Empty Cereal Box
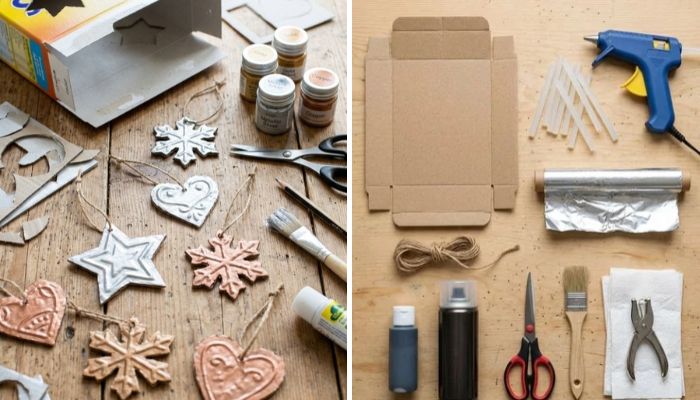
Some DIY projects may look a little messy while you are making them, and this one is a good example. At first, an empty cereal box covered with hot glue lines may not look very attractive. But this simple craft idea can turn ordinary packaging into a beautiful decorative piece. It is an easy and budget-friendly DIY project that adds texture and a unique look to your home décor. With a few basic craft supplies and a little creativity, you can turn something you would normally throw away into something special.
If you love budget-friendly DIY crafts, you will enjoy this project. It is easy to make and uses simple materials you may already have at home. The finished pieces have an old metal look that makes them feel special and unique. This is a great way to reuse empty cereal boxes and create beautiful home décor without spending much money. A little creativity can turn simple household items into something lovely.
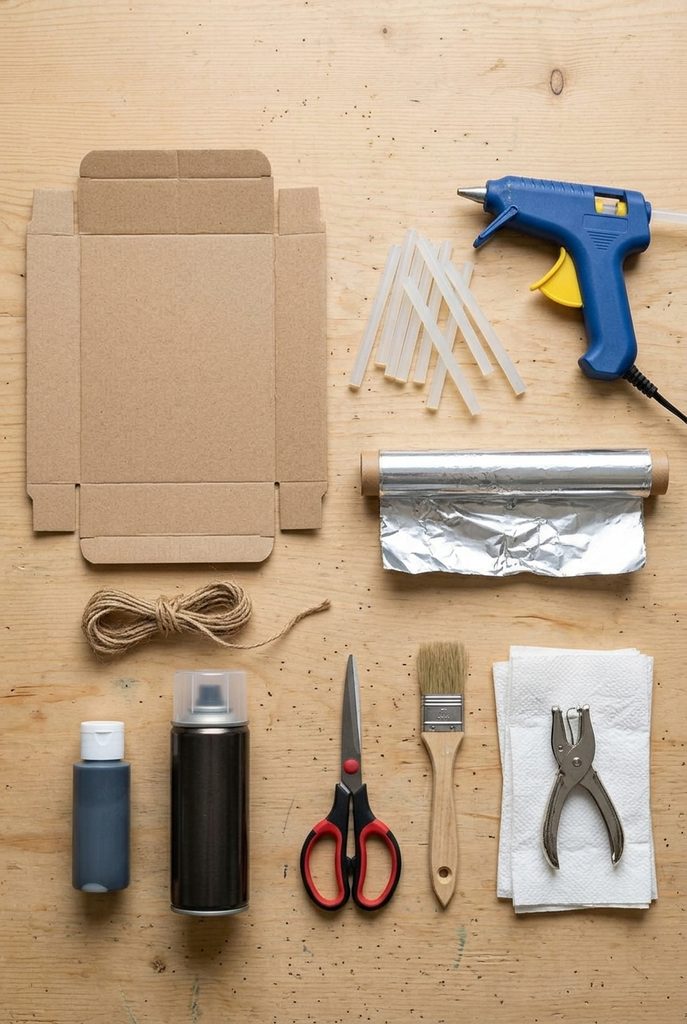
Materials You Will Need
- 1 empty cereal box, opened flat and smoothed out
- 10 standard hot glue sticks
- 1 hot glue gun
- 1 roll of heavy-duty kitchen foil (at least 25 feet)
- 1 small bottle of black acrylic paint (about 2 ounces)
- 1 can of clear spray sealer (10–12 ounces)
- 3 yards of jute twine, cut into 9-inch pieces
- Scissors
- 2 paper towels
- 1 soft brush (1–2 inches wide)
- 1 hole punch
These simple and affordable craft supplies are easy to find at most craft or home improvement stores.
Step-by-Step Instructions
1. Prepare the Cereal Box
Cut the cereal box along its folded edges and open it flat. Place it with the plain gray side facing up. Remove the top and bottom flaps so you have smooth cardboard panels to use.
2. Add Hot Glue Patterns
Heat your glue gun and start making loose lines and swirls across the gray side of the cardboard. Let the glue lines cross and overlap to create a raised pattern. Cover most of the surface, but leave a few small spaces between the lines.
3. Draw and Cut Star Shapes
Allow the hot glue to cool completely. Draw several stars on the cardboard, about 3 to 5 inches wide. Carefully cut out each star, keeping the edges and points neat.
4. Prepare the Aluminum Foil
Tear off enough heavy-duty kitchen foil to cover each star, leaving about 1 inch of extra foil around every edge. Place the foil on a flat surface with the shiny side facing down. Set a cardboard star on top with the glue pattern facing the foil.
5. Press the Foil Into the Pattern
Use your fingers to gently smooth the foil over the star. Then take a folded paper towel and carefully press the foil into the raised glue lines. Start in the middle and work toward the edges. This helps bring out the textured design without tearing the foil.
6. Fold the Extra Foil
Turn the star over and make small cuts in the extra foil around the corners and points. Fold the foil neatly around the back of the cardboard. Press the edges down to keep the star looking clean and smooth.
7. Make More Decorative Stars
Repeat the same steps with the remaining cardboard. One regular cereal box can usually make 8 to 12 stars, depending on their size. If you need more textured pieces, add extra hot glue lines to any unused cardboard.
8. Add an Old Metal Look
Put a small amount of black acrylic paint on a paper towel. Lightly rub or brush the paint over one foil-covered star at a time. Make sure some paint reaches the small spaces between the glue lines. Wipe the raised areas gently so the silver foil shows through. This creates an attractive aged metal effect.
9. Attach the Hanging Strings
Let the paint dry completely. Use a hole punch to make a small hole near the top of each star. Take a 9-inch piece of jute twine, pass it through the hole, and tie the ends together to make a hanging loop.
10. Apply a Protective Finish
Move the finished stars outdoors or to a well-ventilated area. Spray each ornament with a light, even coat of clear sealer. Let the pieces dry flat. You can apply a second thin coat for extra protection and a gentle shine.

Safety Tip: Use care when working with a hot glue gun and scissors. Follow the spray sealer instructions and keep the product away from flames and heat.
Variations and Helpful Tips
1. Create More Detailed Patterns
Try using different hot glue designs, such as small loops, long curves, dots, and short lines. Mixing these patterns will give your ornaments more texture and make them look like old metal decorations after painting.
2. Choose Your Preferred Foil Side
You can use either side of the kitchen foil. The shiny side gives the ornaments a brighter silver finish, while the dull side creates a softer, vintage look. Just make sure the foil is pressed firmly into the glue pattern.
3. Choose the Right Star Size
Stars measuring around 4 to 5 inches wide work especially well for this project. They provide enough space to show the raised glue details. Smaller stars can also look nice, but their patterns may be harder to see.
4. Experiment With Different Shapes
You do not have to make stars only. Try creating hearts, snowflakes, or round decorative shapes. Using the same foil and black paint technique will help all your DIY ornaments look like a matching set.
5. Use Black Paint Carefully
Avoid covering the entire ornament with too much black paint. The best results come when the paint settles into the lower areas while the raised parts remain silver. This creates a beautiful antique metal effect.
6. Find Different Ways to Display Them
These handmade decorations are not just for Christmas trees. You can use them as gift decorations, add them to wreaths, or hang them on decorative garlands. They are an affordable way to add a handmade touch to your holiday décor.